

Valentine Oreo Pops: 5 Sweet Ways to Impress Loved Ones
Oh my goodness, if you’re looking to impress your loved ones this Valentine’s Day, you’ve got to try making these Valentine Oreo Pops! They’re the perfect blend of simplicity and sweetness, making them super fun to prepare. I mean, who doesn’t love a chocolate-covered Oreo on a stick? They’re not just a hit with kids; adults can’t resist them either! Plus, you can customize them with sprinkles or other decorations to match your Valentine’s vibe. Trust me, these delightful treats will have everyone smiling and reaching for more. Let’s get started on this delicious adventure!
Ingredients List
- 12 Oreo cookies (whole)
- 1 cup chocolate chips (melted)
- 1 tablespoon coconut oil (for smooth melting)
- Sprinkles for decoration (your favorite colors!)
- 12 lollipop sticks (to create those adorable pops)
How to Prepare Valentine Oreo Pops
Getting started on these Valentine Oreo Pops is a breeze! Just follow these simple steps, and before you know it, you’ll have a delicious treat ready to impress your loved ones. Let’s dive right in!
Step-by-Step Instructions
Step 1: Crush the Oreo Cookies
First things first, you’ll want to crush those Oreo cookies into fine crumbs. I like to place them in a zip-top bag and use a rolling pin to smash them up, but you can also use a food processor if you have one! Just make sure there are no big chunks left—smooth crumbs are key to making the pops hold together nicely.
Step 2: Melt Chocolate
Now, let’s get that chocolate ready! In a microwave-safe bowl, combine the chocolate chips and coconut oil. Microwave in 30-second intervals, stirring in between, until it’s all melted and smooth. This usually takes about 1 to 1.5 minutes total. Be careful not to overheat it, or the chocolate can seize up, and we don’t want that!
Step 3: Dip the Oreos
Time to dip! Take each crushed Oreo and dip it into the melted chocolate, making sure it’s fully coated. You can use a fork to help lift it out and let the excess chocolate drizzle back into the bowl. This step is so satisfying—you’ll love how it looks all shiny and delicious!
Step 4: Insert Lollipop Sticks
Next, grab those lollipop sticks. While the chocolate is still wet, carefully insert a stick into the center of each Oreo. Make sure to press it in just enough so it’s secure, but not so far that it pokes through the other side. This part is crucial for the stability of your pops!
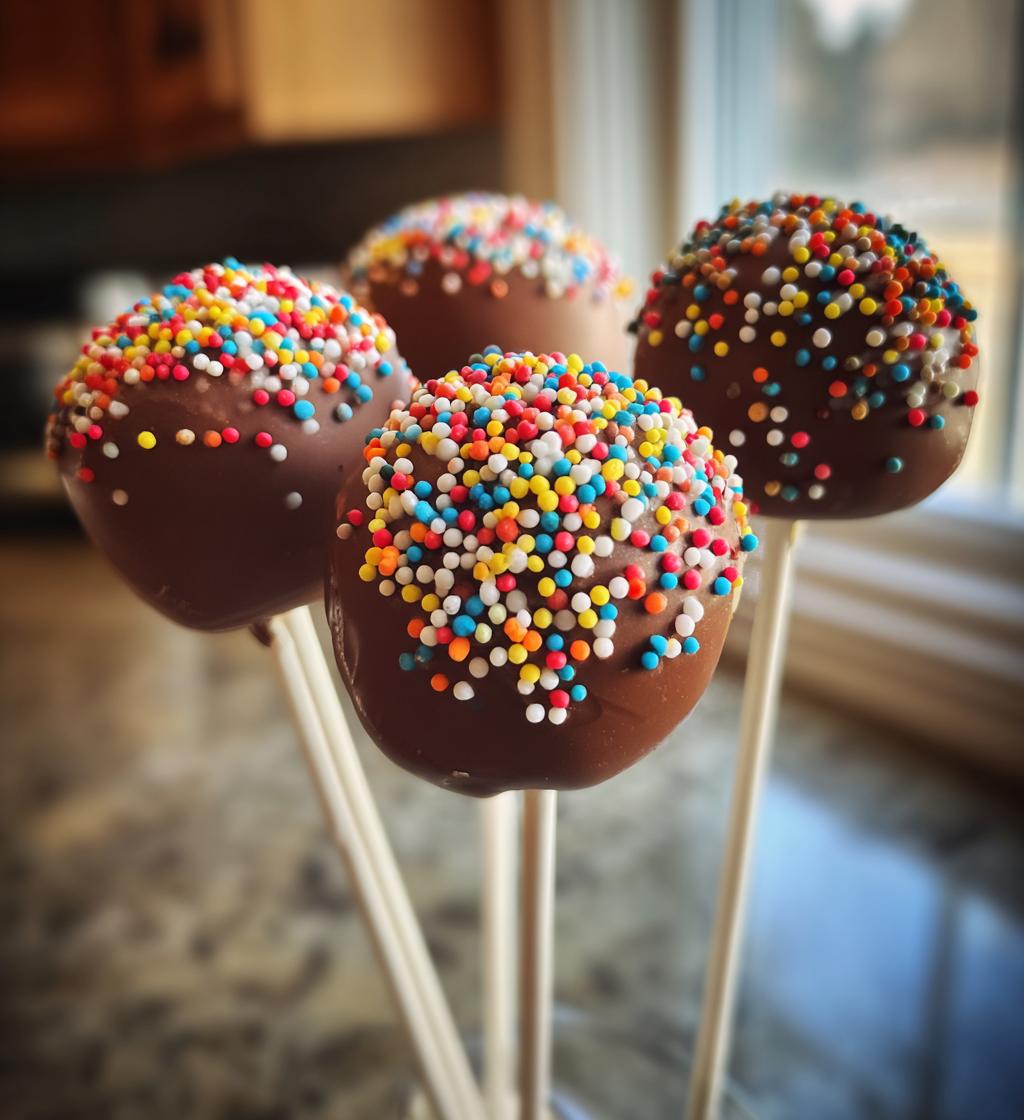
Step 5: Decorate the Pops
Now for the fun part—decorating! Place the dipped Oreos on a sheet of parchment paper and sprinkle your favorite decorations over them while the chocolate is still wet. Get creative! You can use heart-shaped sprinkles for Valentine’s Day or mix in some edible glitter for a little extra flair.
Step 6: Let the Chocolate Harden
Once you’ve decorated all your pops, let them cool until the chocolate hardens. You can either leave them at room temperature for about 30 minutes or pop them in the fridge for about 15 minutes if you’re in a hurry. Just don’t forget about them—once they’re set, they’re ready to be devoured!
Nutritional Information
Here’s the estimated nutritional data for each of these delightful Valentine Oreo Pops. Keep in mind that these numbers are approximate and can vary based on the specific ingredients you use, but they give you a good idea of what you’re working with:
- Calories: 150
- Sugar: 10g
- Fat: 7g
- Saturated Fat: 4g
- Unsaturated Fat: 2g
- Trans Fat: 0g
- Carbohydrates: 20g
- Fiber: 1g
- Protein: 1g
- Cholesterol: 0mg
- Sodium: 50mg
So there you have it—these tasty treats pack quite the punch in flavor without too much guilt. Perfect for sharing, or maybe just keeping all to yourself—no judgment here!
Why You’ll Love This Recipe
Oh, where do I even begin? There are so many reasons to adore these Valentine Oreo Pops! First off, they come together in no time at all—seriously, you can whip them up in just 25 minutes! That means you can squeeze in some last-minute treats just before your Valentine’s Day celebration.
Plus, they’re such a fun activity for kids! I always love getting the little ones involved in the kitchen, and dipping Oreos and adding sprinkles is right up their alley. Watching their creativity come to life is one of my favorite parts!
Speaking of creativity, you can completely customize these pops! Whether you want to go all out with colorful sprinkles or keep it simple with a drizzle of white chocolate, the options are endless. It’s a sweet treat that you can make truly your own.
And let’s not forget how delightful they are for your loved ones! I mean, who wouldn’t appreciate a chocolate-covered cookie on a stick? These pops are perfect for sharing with friends, family, or that special someone, spreading joy and sweetness all around. Trust me, you’re going to love making—and enjoying—these festive treats!
Tips for Success
To make sure your Valentine Oreo Pops turn out absolutely perfect, I’ve got a few handy tips to share! First and foremost, don’t skimp on the chocolate—using high-quality chocolate chips really makes a difference in taste and texture. You want that smooth, velvety coating that just melts in your mouth!
Also, consider adding a tablespoon of coconut oil to the chocolate. It not only helps the chocolate melt evenly but also gives it that gorgeous sheen once set. Trust me, it’s a game changer!
If you want to speed up the process, popping your decorated pops into the fridge for about 15 minutes will help the chocolate set faster. Just keep an eye on them—no one likes a chocolate puddle!
When you’re ready to serve, make sure to store any leftovers in an airtight container to keep them fresh. Nobody wants a stale pop! And if you’re feeling adventurous, try mixing different types of sprinkles or even drizzling some contrasting chocolate on top for a little extra flair. The more colorful, the better! Enjoy your sweet creations!
Variations
Oh, the fun doesn’t stop with just one version of Valentine Oreo Pops! There are so many delightful ways to customize these treats to fit your mood or theme. Let’s get creative!
- White Chocolate Pops: Swap out the chocolate chips for white chocolate for a sweet and creamy twist. It’s perfect for a lighter touch and looks gorgeous when drizzled with dark chocolate!
- Flavor Extracts: Want to elevate the flavor? Add a few drops of your favorite extract to the melted chocolate—vanilla, almond, or even mint can add a wonderful twist!
- Nutty Crunch: Before the chocolate hardens, sprinkle some crushed nuts on top. Think chopped almonds or pistachios for an extra crunch and a sophisticated touch.
- Festive Sprinkles: You can go wild with sprinkles! Use heart-shaped sprinkles for Valentine’s Day or even mix in some edible glitter to make them sparkle.
- Colorful Drizzles: After dipping, melt some colored candy melts and drizzle them over your pops for a fun and colorful design. This is a great way to make them pop visually!
- Cookie Crust: For an added layer of flavor, try rolling the dipped Oreos in crushed graham crackers or more crushed Oreos before the chocolate sets. It adds a nice texture!
The beauty of these Valentine Oreo Pops is that you can truly make them your own. So, don’t be afraid to experiment and let your creativity shine through! Your loved ones will appreciate the personal touch, and you’ll have a blast creating these sweet masterpieces!
Storage & Reheating Instructions
Storing your Valentine Oreo Pops is super simple, and I’ve got some tips to help keep them fresh and delicious! Once you’ve made these delightful treats, simply place them in an airtight container. This keeps them from drying out and protects them from any unwanted odors in your fridge—nobody wants that!
Make sure to layer them carefully if you have multiple pops, placing parchment paper between layers to avoid sticking. They’ll stay good in the fridge for about a week, but trust me, they’ll probably be gone long before then!
Now, if you need to keep them for a longer period, you can freeze them! Just wrap each pop individually in plastic wrap and then place them in a freezer-safe bag or container. They can last for up to two months in the freezer. When you’re ready to enjoy them, simply take them out and let them thaw in the fridge for a couple of hours. No need to reheat—just enjoy them cold and delicious!
So there you have it! Keeping your Valentine Oreo Pops fresh is a breeze, ensuring you can savor the sweetness for days to come!
Serving Suggestions
When it comes to serving your delightful Valentine Oreo Pops, the possibilities are endless! I love to pair these sweet treats with some fun beverages to create a festive atmosphere. Think about serving them alongside a rich hot chocolate or a creamy strawberry milkshake—both are perfect complements to the chocolatey goodness of the pops!
If you want to take it a step further, how about setting up a little dessert table? You could add some heart-shaped cookies or mini cupcakes decorated with pink and red frosting. Just imagine the smiles on everyone’s faces as they indulge in this sweet spread!
For a refreshing twist, consider offering some sparkling water with fresh fruit slices—like strawberries or lemons. It’s a light and bubbly option that balances out the sweetness of the Oreo Pops beautifully!
And don’t forget to have some fun serving options! You could use cute paper straws or decorative plates for a festive touch. Whatever you choose, I promise your Valentine’s Day celebration will feel extra special with these sweet treats at the center of it all!
Print
Valentine Oreo Pops: 5 Sweet Ways to Impress Loved Ones
- Total Time: 25 minutes
- Yield: 12 pops 1x
- Diet: Vegetarian
Description
Delicious chocolate-covered Oreo pops perfect for Valentine’s Day.
Ingredients
- 12 Oreo cookies
- 1 cup chocolate chips
- 1 tablespoon coconut oil
- Sprinkles for decoration
- 12 lollipop sticks
Instructions
- Crush the Oreo cookies into fine crumbs.
- Melt chocolate chips and coconut oil in a microwave-safe bowl.
- Stir until smooth.
- Dip each Oreo in the chocolate mixture.
- Insert a lollipop stick into each cookie.
- Place on parchment paper and sprinkle with decorations.
- Let cool until the chocolate hardens.
Notes
- Use white chocolate for a different flavor.
- Store in an airtight container.
- Keep pops refrigerated for freshness.
- Prep Time: 15 minutes
- Cook Time: 10 minutes
- Category: Dessert
- Method: No-bake
- Cuisine: American
Nutrition
- Serving Size: 1 pop
- Calories: 150
- Sugar: 10g
- Sodium: 50mg
- Fat: 7g
- Saturated Fat: 4g
- Unsaturated Fat: 2g
- Trans Fat: 0g
- Carbohydrates: 20g
- Fiber: 1g
- Protein: 1g
- Cholesterol: 0mg
Keywords: Valentine Oreo Pops, chocolate covered Oreos, Valentine treats