

Valentine Cookie Decorating: 5 Sweet Tips for Joyful Fun
Oh, the joy of Valentine Cookie Decorating! It’s one of those delightful activities that brings friends and family together, and I can’t help but smile just thinking about it. I remember the first time I decorated cookies for Valentine’s Day with my little niece. We went a little wild with the sprinkles and frosting, giggling as we made the most colorful, albeit slightly messy, treats! There’s something so special about creating sweet, personalized cookies that spread love and happiness. Whether you’re making them for a party, your partner, or just for fun, decorating these cookies is a heartwarming way to celebrate the day of love. Trust me, you’re going to adore this!
Ingredients List
- 2 cups all-purpose flour – This is the base for your cookie dough, giving it structure and a lovely texture.
- 1 cup unsalted butter, softened – Make sure it’s at room temperature for easy mixing and that rich buttery flavor!
- 1 cup granulated sugar – This sweetens the cookies and helps create that delightful, tender crumb.
- 1 large egg – The egg binds everything together and adds moisture to the dough.
- 1 teaspoon pure vanilla extract – For that warm, inviting flavor that makes cookies taste irresistible!
- 1/2 teaspoon baking powder – This is your leavening agent, ensuring the cookies rise just right.
- 1/2 teaspoon salt – A pinch of salt enhances the sweetness and balances the flavors beautifully.
- Royal icing for decorating – This icing sets hard, making it perfect for intricate designs and beautiful decorations.
- Food coloring – Use this to bring your royal icing to life with vibrant colors for Valentine’s Day!
- Sprinkles – Because what’s a decorated cookie without a little sparkle and fun?
How to Prepare Instructions
- First things first, preheat your oven to 350°F (175°C). This is a crucial step because it ensures your cookies bake evenly and come out just right!
- In a large mixing bowl, cream together the softened butter and granulated sugar until it’s smooth and fluffy. I love using a hand mixer for this—it makes the job so much easier!
- Next, add in the large egg and pure vanilla extract. Mix until everything is well combined and you can’t see any egg streaks. The aroma of vanilla will be heavenly!
- In another bowl, whisk together the all-purpose flour, baking powder, and salt. This helps to distribute the baking powder evenly throughout the flour.
- Now, gradually add your dry ingredients to the wet mixture. I like to do this in batches, mixing just until everything is blended together. You don’t want to overmix!
- Once your dough is ready, turn it out onto a floured surface and roll it out to about 1/4 inch thick. Make sure to keep the surface floured so it doesn’t stick!
- Using your favorite cookie cutters, cut out fun shapes and place them on a baking sheet. Give them a little space to spread while baking.
- Bake those beauties in your preheated oven for about 8-10 minutes. Keep an eye on them; they’re done when the edges just start to turn golden.
- After baking, let them cool completely on a wire rack before you dive into the decorating fun. Trust me, decorating warm cookies is a sticky situation!
Why You’ll Love This Recipe
- Fun and engaging activity – Decorating cookies is a blast! It’s a wonderful way to bond with friends and family, and trust me, there’s never a dull moment.
- Perfect for all ages – Whether you’re a kid or a kid at heart, everyone can join in on the fun! It’s a great way to unleash creativity.
- Customizable designs – You can get as artistic as you like! With different colors and sprinkles, each cookie can be a unique masterpiece.
- Great way to celebrate Valentine’s Day – These cookies are not just treats; they’re heartfelt gifts that spread love and joy to everyone around.
- Delicious and festive treat – Not only do they look amazing, but they taste incredible too! These cookies are sure to be a hit at any gathering.
Tips for Success
- Use room temperature butter – This makes mixing so much easier and helps achieve that perfect creamy consistency, which is key for delicious cookies!
- Roll dough evenly – Aim for about 1/4 inch thickness across the board. This ensures your cookies bake uniformly, so none are overdone or undercooked.
- Experiment with different colors and designs – Don’t be afraid to let your creativity shine! Mixing food colors can lead to stunning shades that make your cookies pop.
- Let cookies cool completely – I know it’s tempting to start decorating right away, but waiting until they’re fully cooled prevents the icing from melting and running everywhere!
- Have fun with it! – This is all about enjoying the process, so relax, laugh, and don’t stress too much about perfection. Each cookie can be a unique little work of art!
Nutritional Information
Each cookie is approximately 120 calories, making them a sweet treat that’s easy to enjoy! You’ll find about 6g of fat (4g saturated), 1g of protein, and 16g of carbohydrates in each serving. With 8g of sugar and 50mg of sodium, these cookies are indulgent yet manageable in moderation. Remember, these values are estimates, so feel free to enjoy them guilt-free during your Valentine’s Day celebrations!
FAQ Section
How long can I store decorated cookies?
You can store your decorated cookies in an airtight container at room temperature for up to a week. If you want to keep them fresh longer, consider refrigerating them for about two weeks. Just make sure they’re completely dry before stacking them to avoid any smudges on your beautiful designs!
Can I use a different type of icing?
Absolutely! While royal icing is my go-to for its smooth finish and hardening properties, you can use buttercream or even glaze icing if you prefer. Just keep in mind that these might not harden as much, so they’re better suited for cookies that will be eaten right away.
What are some popular cookie cutter shapes for Valentine’s Day?
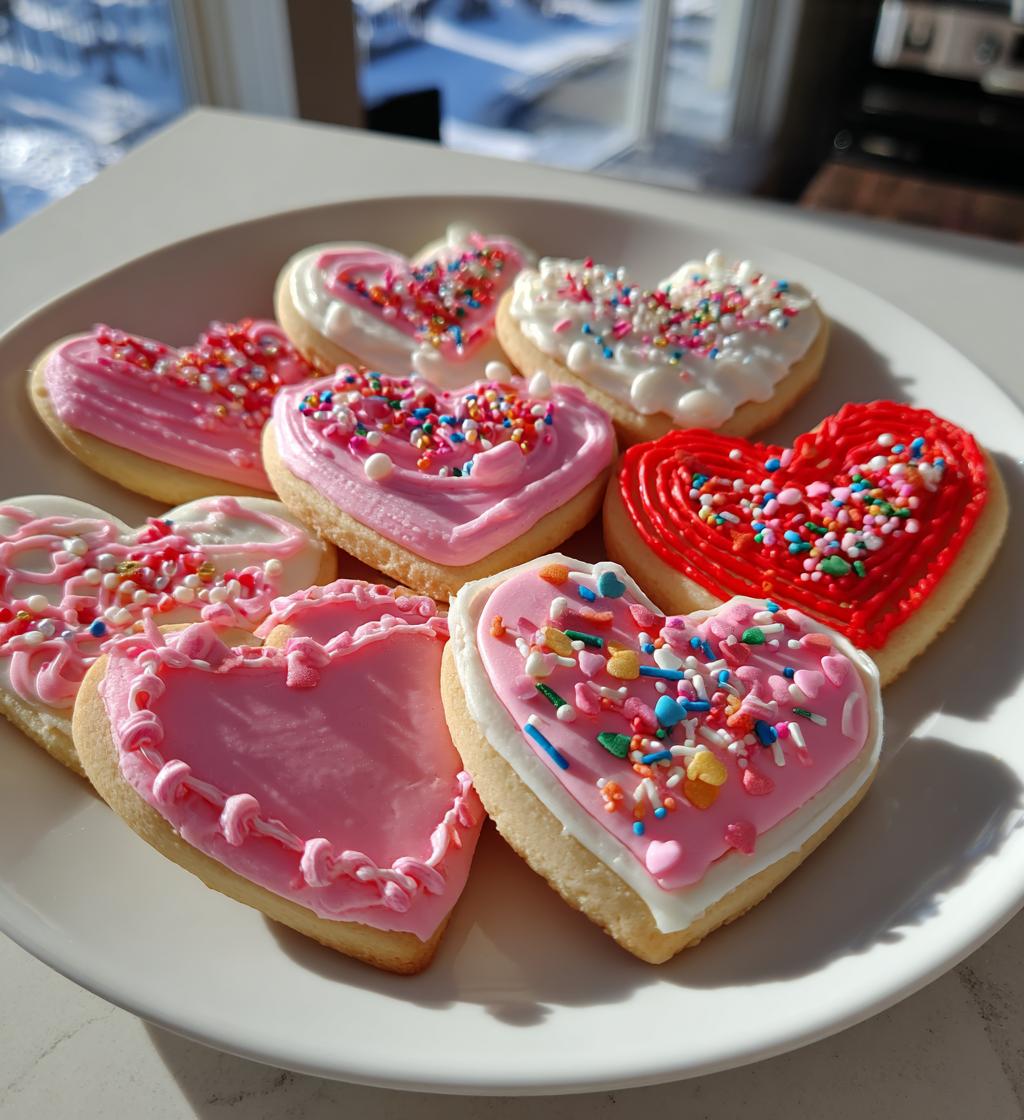
Heart shapes are the classic choice, but don’t stop there! You can also use stars, flowers, or even fun animal shapes. I love mixing it up with themed cutters like lovebirds or Cupid’s arrows to add a unique touch to my cookie platter!
How do I achieve the best color with food coloring?
To get vibrant colors, start with gel food coloring rather than liquid. It’s more concentrated, so you need less for that pop of color! Mix it in gradually until you reach your desired shade. Don’t forget to let your icing sit for a few minutes after mixing to see the true color—it can darken a bit as it sets!
Storage & Reheating Instructions
To keep your decorated cookies fresh and tasty, store them in an airtight container at room temperature. This will help maintain their texture and flavor for up to a week. If you’d like to enjoy them a bit longer, you can refrigerate them for up to two weeks—just make sure they’re completely dry to avoid smudging those beautiful designs!
If you ever find yourself wanting to savor a cookie again, you can gently reheat them in the microwave for about 5-10 seconds. This will give them a warm, soft texture, but be careful not to overheat them, or they might get tough! Enjoy every bite of your sweet creations!
Serving Suggestions
These delightful decorated cookies are perfect for sharing at any Valentine’s gathering! I love serving them alongside a warm cup of hot chocolate or a rich coffee. They make a lovely treat for an afternoon get-together or a cozy movie night with loved ones. You could even package a few with a sweet note for a charming gift! Trust me, they’ll be a hit either way!
Print
Valentine Cookie Decorating: 5 Sweet Tips for Joyful Fun
- Total Time: 40 minutes
- Yield: 24 cookies 1x
- Diet: Vegetarian
Description
A fun activity for creating decorated cookies for Valentine’s Day.
Ingredients
- 2 cups all-purpose flour
- 1 cup unsalted butter, softened
- 1 cup granulated sugar
- 1 egg
- 1 teaspoon vanilla extract
- 1/2 teaspoon baking powder
- 1/2 teaspoon salt
- Royal icing for decorating
- Food coloring
- Sprinkles
Instructions
- Preheat your oven to 350°F (175°C).
- In a bowl, cream together the butter and sugar until smooth.
- Add the egg and vanilla extract, mixing well.
- In another bowl, combine flour, baking powder, and salt.
- Gradually add the dry ingredients to the wet mixture until well blended.
- Roll out the dough on a floured surface to about 1/4 inch thick.
- Cut out shapes using cookie cutters.
- Place cookies on a baking sheet and bake for 8-10 minutes.
- Let cool completely before decorating.
- Use royal icing and food coloring to decorate as desired.
Notes
- Store cookies in an airtight container.
- Use different colors for various designs.
- Consider using themed cookie cutters.
- Prep Time: 30 minutes
- Cook Time: 10 minutes
- Category: Dessert
- Method: Baking
- Cuisine: American
Nutrition
- Serving Size: 1 cookie
- Calories: 120
- Sugar: 8g
- Sodium: 50mg
- Fat: 6g
- Saturated Fat: 4g
- Unsaturated Fat: 2g
- Trans Fat: 0g
- Carbohydrates: 16g
- Fiber: 0g
- Protein: 1g
- Cholesterol: 20mg
Keywords: Valentine Cookie Decorating