

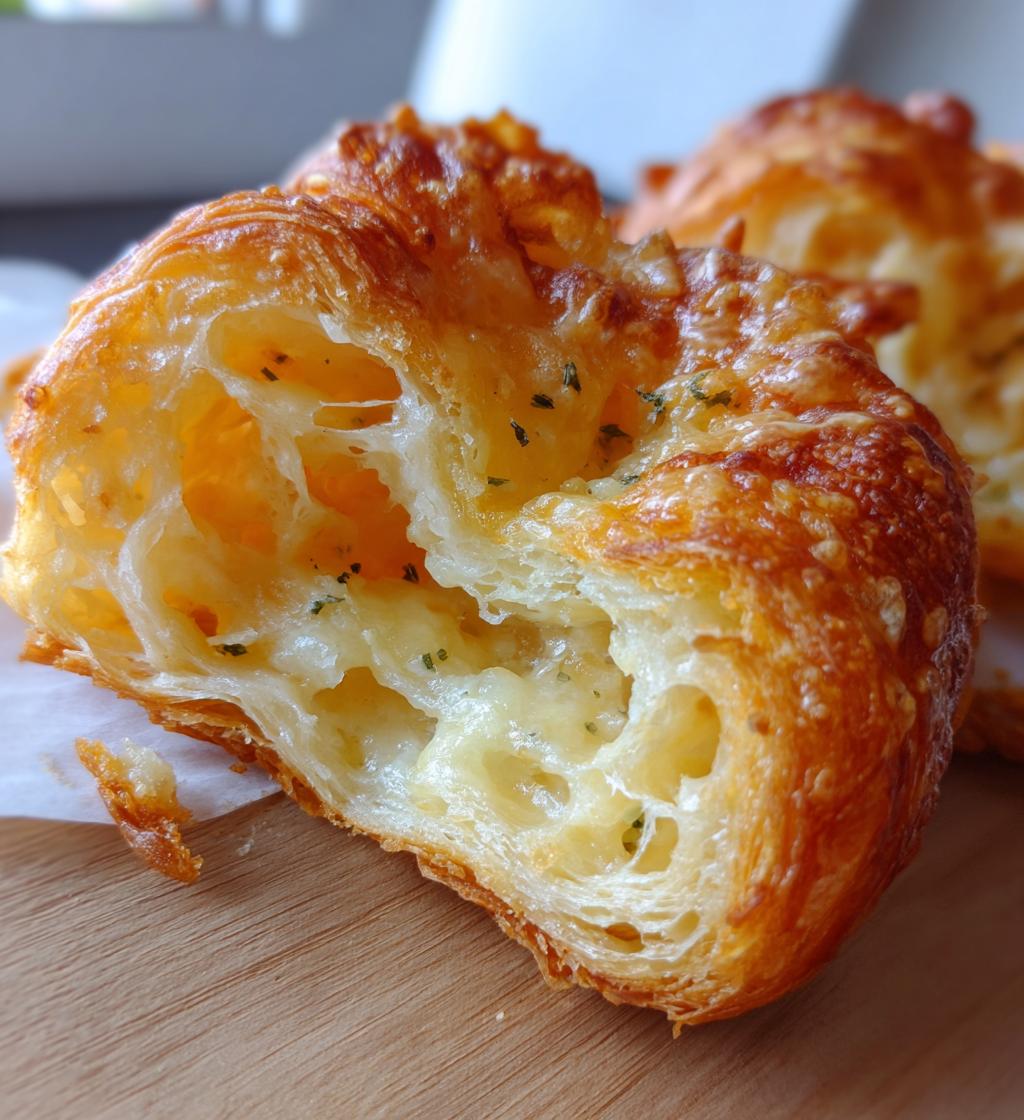
Cheesy Garlic Cruffin: 7 Steps to Cheesy Perfection
Oh my goodness, let me tell you about the Cheesy Garlic Cruffin! It’s like a heavenly cross between a croissant and a muffin, all filled with deliciously gooey cheese and a punch of garlic. Seriously, every bite is a warm hug for your taste buds! I remember the first time I made these little beauties—it was a rainy afternoon, and I just needed something comforting. As the buttery aroma filled my kitchen, I couldn’t wait to sink my teeth into that flaky goodness. Trust me, once you pull these out of the oven and take that first bite, you’ll be hooked! They’re perfect for brunch, a snack, or even a cheeky late-night treat. So grab your apron, and let’s get started on this cheesy, garlicky adventure!
Ingredients List
Gather these simple ingredients to create your Cheesy Garlic Cruffin. Each one plays a crucial role in delivering that irresistible cheesy, garlicky flavor that you’ll absolutely love!
- 1 cup all-purpose flour
- 1/2 cup shredded mozzarella cheese (the gooey kind, please!)
- 1/4 cup grated parmesan cheese (for that salty, nutty kick)
- 1/2 cup warm milk (not too hot, just warm enough to activate the yeast)
- 1/4 cup unsalted butter, melted (the secret to flakiness!)
- 2 cloves garlic, minced (fresh is best for that punch of flavor)
- 1 tablespoon sugar (to help feed the yeast and add a hint of sweetness)
- 1 teaspoon salt (to balance those flavors out)
- 1 packet active dry yeast (about 2 1/4 teaspoons)
- 1 egg (to enrich the dough and give it that lovely texture)
Make sure you have everything on hand, because trust me, you don’t want to be halfway through and realize you’re missing something! Happy cooking!
How to Prepare the Cheesy Garlic Cruffin
Now, let’s dive into making these delightful Cheesy Garlic Cruffins! I promise you, following these steps will lead you to flaky, cheesy perfection. So, let’s get our hands a little doughy!
Making the Dough
First off, grab a bowl and combine that warm milk and sugar. Give it a little stir, then sprinkle in your active dry yeast. Let it sit for about 5 minutes until it gets all frothy and bubbly—this is how you know your yeast is alive and ready to work its magic! Once it’s frothy, mix in the melted butter, egg, and salt. Now, gradually add in the flour, mixing until a soft dough starts to form. It’s okay if it’s a little sticky; we’ll knead it shortly!
Now, let’s knead! Turn the dough out onto a lightly floured surface and knead for about 5 minutes until it’s smooth and elastic. It should feel nice and soft in your hands. Once you’re done, place it in a lightly greased bowl, cover it with a clean towel or plastic wrap, and let it rise in a warm spot for about an hour or until it doubles in size. This is your dough’s time to shine!
Rolling and Filling
Once the dough has risen, it’s time to roll out that beauty! Preheat your oven to 375°F (190°C) while you’re at it. Flour your surface again and roll the dough into a rectangle, about 1/4 inch thick. Now, here comes the fun part! Spread the minced garlic evenly over the dough, then sprinkle that wonderful mozzarella and parmesan cheese all over. I like to go heavy on the cheese because, well, there’s no such thing as too much cheese, right?
Next, roll the dough tightly from one end to the other, like you’re making a cinnamon roll, but with all that cheesy goodness! Once it’s rolled up, slice it into about 12 equal pieces. They don’t have to be perfect, but try to keep them uniform so they bake evenly. Place those slices cut-side up in a greased muffin tin, and they’ll be rising again in no time.
Rising and Baking
Let those lovely cruffin slices rise for another 30 minutes. This second rise is crucial for achieving that glorious fluffiness! While they’re rising, you can finish preheating your oven if you haven’t already. When they’re nice and puffy, pop them into the oven and bake for about 20-25 minutes. You want them to turn golden brown and smell absolutely irresistible—trust me, your kitchen will smell like a cheesy wonderland!
Once they’re out of the oven, allow them to cool slightly before diving in. I know it’s hard to resist, but a few minutes will make a big difference in keeping all that gooey cheese intact. Enjoy every cheesy, garlicky bite!
Why You’ll Love This Recipe
- Irresistible Flavor: The combination of gooey cheese and aromatic garlic is simply out of this world!
- Quick Prep Time: With a total time of just about 1 hour and 40 minutes, these cruffins come together faster than you’d think!
- Versatile Treat: Perfect for breakfast, brunch, or even as a snack—these cruffins fit any occasion!
- Flaky and Buttery: Thanks to the buttery dough, each bite offers that delightful flaky texture you crave.
- Customizable: Feel free to switch up the cheeses or add herbs for a personal twist on the classic recipe!
- Crowd-Pleaser: Whether it’s a family gathering or a casual get-together, these cruffins are sure to impress your guests!
Honestly, once you try these, you’ll wonder how you ever lived without them. They’re a cheesy dream come true!
Tips for Success
Ready to take your Cheesy Garlic Cruffins to the next level? Here are my top tips to ensure your cruffins turn out perfectly every time!
- Temperature Matters: Make sure your milk is warm, but not hot! If it’s too hot, it can kill the yeast, and we definitely don’t want that. A good rule of thumb is to make it just warm to the touch.
- Fresh Yeast: Always check the expiration date on your yeast. Fresh yeast is essential for that lovely rise, so if you’re unsure, test it by letting it froth in warm milk before adding it to the mix.
- Kneading Technique: When kneading, don’t be afraid to put a little muscle into it! A smooth, elastic dough is key to getting those flaky layers. If it feels too sticky, sprinkle a tiny bit more flour as you knead.
- Don’t Rush the Rise: Give your dough plenty of time to rise. If your kitchen is cool, it might take a bit longer, so be patient! You want that dough to double in size for the best texture.
- Experiment with Cheeses: While mozzarella and parmesan are delicious, feel free to mix it up! Try adding some cheddar or gouda for a different flavor profile. Just remember to adjust quantities to keep that gooey texture.
- Keep an Eye on Baking: Ovens can vary, so start checking your cruffins a few minutes before the timer goes off. You want them golden brown with that amazing cheesy aroma wafting through your kitchen!
With these tips in your back pocket, you’re all set to impress with your Cheesy Garlic Cruffins! Enjoy the process and don’t forget to have fun while baking!
Nutritional Information
Let’s talk about the numbers! Here’s the estimated nutritional information for each Cheesy Garlic Cruffin, so you can enjoy them with a little awareness:
- Calories: 180
- Fat: 8g
- Saturated Fat: 5g
- Unsaturated Fat: 2g
- Trans Fat: 0g
- Cholesterol: 30mg
- Sodium: 250mg
- Carbohydrates: 20g
- Fiber: 1g
- Protein: 5g
- Sugar: 1g
Keep in mind, these values are estimates based on standard ingredient measurements, so they might vary a bit depending on your specific ingredients. But hey, when you’re enjoying these cheesy delights, who’s counting? Just savor every bite!
Serving Suggestions
Now that you’ve whipped up a batch of those scrumptious Cheesy Garlic Cruffins, let’s talk about how to enjoy them! These delightful treats are incredibly versatile and can fit into so many occasions. Here are some of my favorite ways to serve them:
- Brunch Delight: Pair your cruffins with a fresh fruit salad and a side of scrambled eggs for a satisfying weekend brunch. The cheesy goodness complements the lightness of the fruit beautifully!
- Cozy Dinner: Serve them alongside a warm bowl of tomato soup for a comforting meal. The cheesy cruffins are perfect for dipping and add a delightful twist to your classic soup and bread combo.
- Snack Attack: Enjoy them as a savory snack on their own, or with a spread of creamy butter or herbed cream cheese. They’re also fantastic with a glass of wine for a casual evening treat!
- Picnic Perfect: Pack these cruffins for your next picnic! They travel well and are sure to impress your friends—imagine the smiles when you pull these out of your basket!
- Game Day Goodies: These cruffins make a wonderful addition to any game day spread. Set them out on a platter with some marinara sauce for dipping, and watch them disappear!
Honestly, the possibilities are endless! No matter when or how you serve them, these Cheesy Garlic Cruffins are bound to be a hit. Enjoy every cheesy moment!
FAQ Section
Can I make these cruffins ahead of time? Absolutely! You can prepare the dough and shape the cruffins, then cover and refrigerate them overnight. Just let them rise for about 30-45 minutes at room temperature before baking the next day. It’s a great way to have fresh Cheesy Garlic Cruffins ready for brunch with minimal morning fuss!
What if I don’t have all-purpose flour? No worries! You can substitute with bread flour for a chewier texture or even whole wheat flour for a nuttier flavor. Just keep in mind that different flours might slightly alter the texture, but they’ll still taste amazing!
Can I freeze the cruffins? Yes, you can! After baking, let them cool completely, then store them in an airtight container or freezer bag. They’ll keep well in the freezer for up to 2 months. Just pop them in the oven to reheat and get that flaky goodness back!
How do I know when my cruffins are done baking? You’ll want to keep an eye on them! They’re perfectly done when they’re golden brown on top and the cheese is bubbling. A gentle tap on the top should sound hollow, indicating they’re ready to come out of the oven!
Can I add other fillings to my cruffins? Totally! Feel free to get creative! You can add cooked bacon, sautéed spinach, or even sun-dried tomatoes for an extra flavor boost. Just remember not to overstuff them—balance is key for that perfect texture!
Print
Cheesy Garlic Cruffin: 7 Steps to Cheesy Perfection
- Total Time: 1 hour 40 minutes
- Yield: 12 cruffins 1x
- Diet: Vegetarian
Description
A delicious blend of cheesy and garlicky flavors baked into a flaky cruffin.
Ingredients
- 1 cup all-purpose flour
- 1/2 cup shredded mozzarella cheese
- 1/4 cup grated parmesan cheese
- 1/2 cup warm milk
- 1/4 cup unsalted butter, melted
- 2 cloves garlic, minced
- 1 tablespoon sugar
- 1 teaspoon salt
- 1 packet active dry yeast
- 1 egg
Instructions
- In a bowl, combine warm milk and sugar. Stir in yeast and let it sit for 5 minutes.
- Add melted butter, egg, and salt to the yeast mixture.
- Gradually mix in flour until a dough forms.
- Knead the dough for 5 minutes until smooth.
- Cover the dough and let it rise for 1 hour until doubled.
- Preheat the oven to 375°F (190°C).
- Roll out the dough into a rectangle, spread minced garlic, and sprinkle cheeses.
- Roll the dough tightly and slice into pieces.
- Place the slices in a muffin tin and let them rise for another 30 minutes.
- Bake for 20-25 minutes until golden brown.
Notes
- Serve warm for best flavor.
- Adjust cheese types for different flavors.
- Store leftovers in an airtight container.
- Prep Time: 1 hour 15 minutes
- Cook Time: 25 minutes
- Category: Baked Goods
- Method: Baking
- Cuisine: American
Nutrition
- Serving Size: 1 cruffin
- Calories: 180
- Sugar: 1g
- Sodium: 250mg
- Fat: 8g
- Saturated Fat: 5g
- Unsaturated Fat: 2g
- Trans Fat: 0g
- Carbohydrates: 20g
- Fiber: 1g
- Protein: 5g
- Cholesterol: 30mg
Keywords: Cheesy Garlic Cruffin