

Red Velvet Waffles: 7 Reasons They’ll Brighten Your Breakfast
Oh my goodness, let me tell you about the sheer joy of breakfast when it involves *Red Velvet Waffles*! I remember the first time I tried these beauties; I was at a cozy little brunch spot, and the moment I took a bite, I was hooked! The rich, velvety texture paired with that hint of cocoa just takes waffles to a whole new level. It’s like a fun twist on the classic breakfast staple, and honestly, who doesn’t love a splash of color on their plate? These waffles not only look stunning but taste absolutely divine! Imagine waking up to a plate of vibrant red waffles drizzled with cream cheese icing—it’s a breakfast that feels like a celebration. Trust me, once you try them, you’ll be dreaming about this delightful dish long after your fork is empty!
Ingredients for Red Velvet Waffles
Gathering the ingredients for these *Red Velvet Waffles* is super easy! Here’s what you’ll need:
- 1 cup all-purpose flour – this is the base for our waffles, giving them that perfect fluffy texture.
- 1 tablespoon cocoa powder – just a touch to enhance that chocolatey flavor without overpowering the red velvet vibe.
- 1 tablespoon sugar – to add a hint of sweetness that makes these waffles irresistible.
- 1 teaspoon baking powder – this is our leavening agent, helping the waffles rise beautifully.
- 1/2 teaspoon baking soda – this will help them get that nice golden-brown color.
- 1/4 teaspoon salt – just a pinch to balance the flavors and bring everything together.
- 1 cup buttermilk – for that lovely tang and moistness that makes every bite melt in your mouth.
- 1 large egg – this helps bind everything and gives the waffles a rich texture.
- 1 tablespoon vegetable oil – to keep the waffles from sticking and add a bit of richness.
- 1 tablespoon red food coloring – because we need that gorgeous red hue to make these waffles pop!
- 1 teaspoon vanilla extract – for a dash of warm, comforting flavor that ties it all together.
How to Prepare Red Velvet Waffles
Now, let’s get down to the fun part—making those glorious *Red Velvet Waffles*! I promise, it’s easier than you might think. Just follow these simple steps, and you’ll have a breakfast that will wow everyone at the table!
Step-by-Step Instructions
- First things first, preheat your waffle iron. This is crucial! A hot waffle iron means crispy edges and a fluffy center, so don’t skip this step.
- In a medium bowl, whisk together the dry ingredients: 1 cup of all-purpose flour, 1 tablespoon of cocoa powder, 1 tablespoon of sugar, 1 teaspoon of baking powder, 1/2 teaspoon of baking soda, and 1/4 teaspoon of salt. Make sure it’s well mixed for even flavor!
- In another bowl, combine the wet ingredients. Whisk together 1 cup of buttermilk, 1 large egg, 1 tablespoon of vegetable oil, 1 tablespoon of red food coloring, and 1 teaspoon of vanilla extract until everything is nicely blended.
- Now, it’s time to bring the two mixtures together! Pour the wet ingredients into the dry ingredients and gently mix until just combined. Be careful not to overmix; a few lumps are perfectly fine. This will keep your waffles light and fluffy!
- Once your batter is ready, it’s time to cook! Pour the batter into your preheated waffle iron—about 1/2 cup for each waffle works well. Close the lid and let it cook until the waffles are golden brown. This usually takes about 4-6 minutes, but keep an eye on them! You’ll want to check your waffle iron’s instructions because every one is a bit different.
- When the waffles are done, carefully remove them from the iron. They’ll be hot, so use a fork or tongs. I like to keep them warm in a low oven while I finish the rest. Just place them on a baking sheet and cover them with a clean kitchen towel.
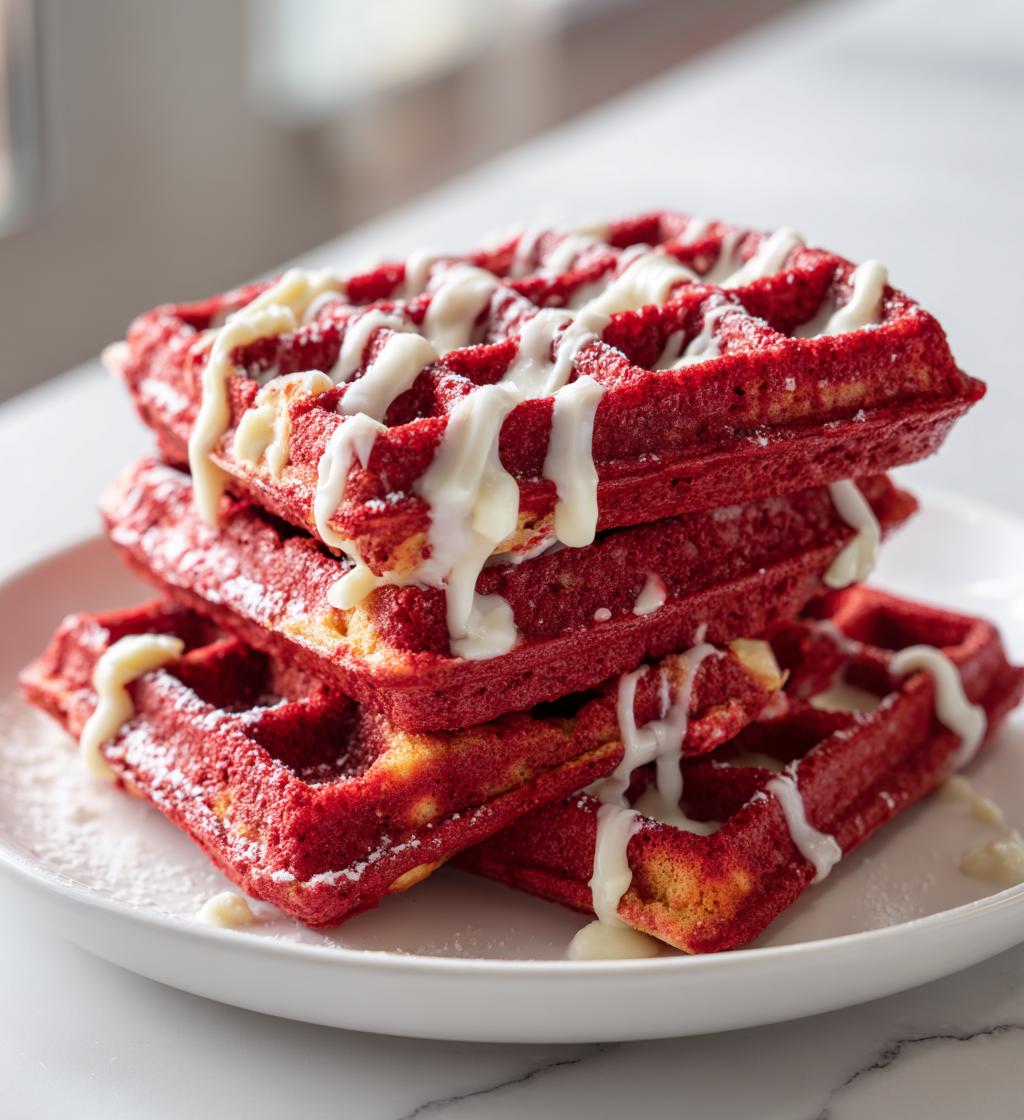
- Finally, serve those beautiful waffles with a generous drizzle of cream cheese icing. You can make your own or use store-bought—either way, it’s the perfect finishing touch!
And there you have it! Perfectly fluffy and decadently delicious *Red Velvet Waffles* ready to brighten up your breakfast table. Enjoy every scrumptious bite!
Why You’ll Love This Recipe
- It’s super quick to prepare—ready in just 25 minutes, perfect for busy mornings!
- The vibrant red color makes for a stunning presentation that will impress anyone at the breakfast table.
- Deliciously decadent with a rich, velvety texture that feels like a special treat.
- Fun twist on classic waffles that adds a playful touch to your morning routine.
- Pair it with cream cheese icing for that extra layer of sweetness that takes it over the top!
- Great for special occasions, brunches, or when you just want to spoil yourself a little.
- Completely customizable—add your favorite toppings like fresh berries or whipped cream!
Tips for Success
Alright, let’s make sure your *Red Velvet Waffles* turn out absolutely perfect! Here are some handy tips to keep in mind:
- Preheat is key! Make sure your waffle iron is fully preheated before pouring in the batter. This helps achieve that lovely crispy exterior while keeping the inside fluffy.
- Don’t overmix! When you combine the wet and dry ingredients, mix just until everything is moistened. Overmixing can lead to tough waffles, and nobody wants that!
- Check your cooking times. Waffle irons vary, so keep an eye on your waffles as they cook. Usually, 4-6 minutes is perfect, but it’s best to follow your specific waffle iron’s instructions.
- Use the right amount of batter. For most waffle irons, about 1/2 cup of batter per waffle works great. If you add too much, it’ll overflow, and if you add too little, you won’t get that perfect thickness.
- Keep them warm. If you’re making a big batch, pop the cooked waffles on a baking sheet in a low oven (around 200°F or 93°C) to keep them warm without getting soggy.
- Experiment with toppings! While cream cheese icing is a must, don’t hesitate to add fresh fruit, nuts, or a sprinkle of powdered sugar for an extra touch of deliciousness!
- Let them cool slightly before stacking. If you’re making a stack for serving, give them a minute to cool off. This prevents them from steaming and getting soggy when piled on top of each other.
With these tips in your back pocket, you’re all set to whip up some show-stopping *Red Velvet Waffles*. Enjoy the process and happy cooking!
Nutritional Information
Now, let’s take a quick look at the nutritional info for these delightful *Red Velvet Waffles*! Keep in mind that these values are estimates based on typical ingredient usage, so they might vary slightly depending on your specific choices or portion sizes.
- Serving Size: 1 waffle
- Calories: 250
- Total Fat: 10g
- Saturated Fat: 2g
- Unsaturated Fat: 8g
- Trans Fat: 0g
- Cholesterol: 30mg
- Sodium: 300mg
- Total Carbohydrates: 35g
- Dietary Fiber: 1g
- Sugars: 10g
- Protein: 5g
These waffles are not only a feast for the eyes but also a delightful way to start your day without feeling guilty! Enjoy them as they are or add your favorite toppings for a little extra nutrition and flavor. Happy indulging!
FAQ About Red Velvet Waffles
Got questions? No problem! Here are some of the most common queries I get about making *Red Velvet Waffles*, along with my answers to help you out:
Can I use regular milk instead of buttermilk?
Absolutely! If you don’t have buttermilk on hand, you can make a quick substitute by adding 1 tablespoon of vinegar or lemon juice to 1 cup of regular milk. Let it sit for about 5 minutes, and voilà! You’ve got your buttermilk substitute ready to go.
What if I don’t have red food coloring?
No worries! You can simply skip it for a more chocolatey waffle, or you can use beet juice or a bit of pomegranate juice for a natural alternative. Just keep in mind that the color won’t be as vibrant, but the taste will still be delicious!
Can I make these waffles ahead of time?
Yes! You can whip up the batter ahead of time and store it in the fridge for a day. Just give it a gentle stir before using. Alternatively, you can cook the waffles, let them cool, and store them in an airtight container. When you’re ready, just reheat them in the toaster or oven to get that crispy texture back.
How do I store leftover waffles?
Store any leftover *Red Velvet Waffles* in an airtight container in the fridge for up to 3 days. If you want to keep them longer, you can freeze them! Just place parchment paper between the waffles to prevent sticking. They’ll be perfect for a quick breakfast later on!
What toppings do you recommend?
Oh, the possibilities are endless! I love serving mine with cream cheese icing, fresh berries, or a drizzle of maple syrup. You could even go wild with whipped cream and a sprinkle of nuts for added crunch. Experiment with your favorites and make it your own!
I hope this clears up any questions you had! Enjoy making your *Red Velvet Waffles*, and remember, the best part is indulging in them with those you love!
Serving Suggestions
Now that you’ve whipped up a batch of those stunning *Red Velvet Waffles*, let’s talk about how to make them even more special when it comes time to serve! There are so many delicious options that can elevate your breakfast experience. Here are some of my favorite ideas:
- Fresh Fruit: Fresh berries like strawberries, blueberries, or raspberries add a burst of color and a refreshing contrast to the rich waffles. Slice up some bananas or even peaches for a sweet, juicy pairing.
- Whipped Cream: A generous dollop of whipped cream is always a winner! You can either use store-bought or whip up your own for that extra fluffiness. It adds a light creaminess that complements the waffles perfectly.
- Cream Cheese Icing: Don’t forget to drizzle more cream cheese icing on top! It’s a classic pairing that ties everything together and makes each bite indulgent.
- Maple Syrup: For a traditional touch, drizzle some warm maple syrup over your waffles. The sweetness pairs beautifully with the chocolatey notes of the waffles.
- Nuts: Sprinkle some chopped pecans or walnuts for a delicious crunch that contrasts nicely with the soft texture of the waffles.
- Chocolate Chips: If you’re a chocolate lover, sprinkle some mini chocolate chips on top for that extra chocolatey goodness. They melt slightly and create a decadent experience!
- Ice Cream: Feeling indulgent? Serve your *Red Velvet Waffles* with a scoop of vanilla or cream cheese ice cream. It’s a delightful way to turn breakfast into dessert!
Mix and match these toppings to create your perfect plate! The beauty of *Red Velvet Waffles* is that they’re so versatile—you can customize them to suit your mood and taste. Enjoy your delicious creation and the smiles it brings to the breakfast table!
Storage & Reheating Instructions
Let’s talk about how to keep those delicious *Red Velvet Waffles* fresh for future enjoyment! Storing and reheating them properly is key to maintaining that perfect texture and taste.
First off, if you have any leftovers (which I hope you do because they’re so good!), let them cool completely before storing. Place the waffles in an airtight container. If you want to keep them for more than a day or two, I highly recommend freezing them. Just layer parchment paper between each waffle to prevent them from sticking together. They’ll be good in the freezer for up to 2 months!
When you’re ready to enjoy your waffles again, there are a couple of great reheating methods:
- Toaster: This is my favorite method! Just pop the frozen waffles straight into the toaster. They come out crispy on the outside and warm on the inside—just like fresh out of the waffle iron!
- Oven: Preheat your oven to 350°F (175°C). Arrange the waffles on a baking sheet and cover them with aluminum foil to prevent them from getting too brown. Heat for about 10-15 minutes, or until warmed through.
- Microwave: If you’re in a hurry, you can microwave the waffles for about 30 seconds to 1 minute, but I advise this method only if you’re really short on time. They might lose that lovely crispiness, but they’ll still taste great!
With these simple storage and reheating tips, you can enjoy your *Red Velvet Waffles* any time you like! They’re perfect for a quick breakfast or a lovely brunch treat. So go ahead, make a big batch, and savor every delicious bite later on!
Print
Red Velvet Waffles: 7 Reasons They’ll Brighten Your Breakfast
- Total Time: 25 minutes
- Yield: 4 servings 1x
- Diet: Vegetarian
Description
Delicious red velvet waffles with cream cheese icing.
Ingredients
- 1 cup all-purpose flour
- 1 tablespoon cocoa powder
- 1 tablespoon sugar
- 1 teaspoon baking powder
- 1/2 teaspoon baking soda
- 1/4 teaspoon salt
- 1 cup buttermilk
- 1 large egg
- 1 tablespoon vegetable oil
- 1 tablespoon red food coloring
- 1 teaspoon vanilla extract
Instructions
- Preheat the waffle iron.
- In a bowl, mix flour, cocoa powder, sugar, baking powder, baking soda, and salt.
- In another bowl, whisk buttermilk, egg, oil, food coloring, and vanilla.
- Combine wet and dry ingredients.
- Pour batter into the waffle iron and cook until golden brown.
- Serve with cream cheese icing.
Notes
- Ensure your waffle iron is properly heated for best results.
- Adjust the food coloring for desired color intensity.
- Prep Time: 10 minutes
- Cook Time: 15 minutes
- Category: Breakfast
- Method: Waffle
- Cuisine: American
Nutrition
- Serving Size: 1 waffle
- Calories: 250
- Sugar: 10g
- Sodium: 300mg
- Fat: 10g
- Saturated Fat: 2g
- Unsaturated Fat: 8g
- Trans Fat: 0g
- Carbohydrates: 35g
- Fiber: 1g
- Protein: 5g
- Cholesterol: 30mg
Keywords: Red Velvet Waffles