

Pumpkin Rolls: 5 Cozy Reasons to Love This Fall Delight
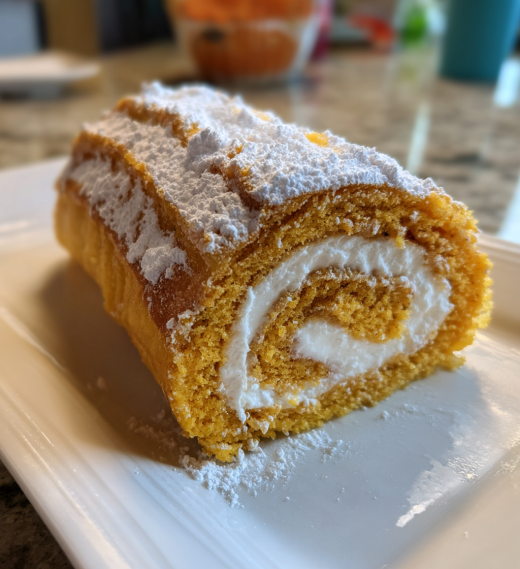
Oh my goodness, let me tell you about my absolute favorite fall treat: pumpkin rolls! These delightful little rolls are not just a dessert; they’re a celebration of everything cozy and warm about the season. Imagine a soft, sponge cake that’s infused with that lovely pumpkin flavor and warm spices, rolled up with a creamy, dreamy cream cheese frosting. Seriously, it’s like a hug in dessert form! I whip these up every year when the leaves start to turn, and they never fail to impress. They’re perfect for gatherings, cozy nights in, or just when you need a sweet pick-me-up. Trust me, once you try making these pumpkin rolls, you’ll want to share them with everyone you know!
Ingredients List
You’re going to love how straightforward this ingredient list is! Here’s everything you need to whip up those delicious pumpkin rolls:
- 2 cups all-purpose flour
- 1 teaspoon baking powder
- 1 teaspoon baking soda
- 1/2 teaspoon salt
- 1 teaspoon ground cinnamon
- 1/2 teaspoon ground ginger
- 1 cup granulated sugar
- 1 cup canned pumpkin puree
- 3 large eggs
- 1 teaspoon vanilla extract
- 8 oz cream cheese, softened
- 1/2 cup powdered sugar
- 1/4 cup unsalted butter, softened
Make sure your cream cheese and butter are softened for easy mixing; it really makes a difference in that luscious filling! And don’t forget to grab that lovely pumpkin puree—it’s the star of the show!
How to Prepare Pumpkin Rolls
Alright, let’s dive into the magic of making these pumpkin rolls! I promise, it’s easier than you think, and the end result is so worth it. Just follow these steps, and you’ll have a delightful dessert that will impress everyone!
Prepping the Batter
First up, we need to get our batter ready! Start by grabbing a large mixing bowl. In it, whisk together the flour, baking powder, baking soda, salt, cinnamon, and ginger. This combination is where the magic of fall flavors begins! Make sure everything is well blended.
In another bowl, you’ll mix the wet ingredients. Combine the granulated sugar, pumpkin puree, eggs, and vanilla extract. Whisk them together until it’s all smooth and creamy. Now, here’s a little tip: pouring the wet ingredients into the dry ingredients works best. Just gently fold them together until there are no dry spots left. You don’t want to overmix it; we want that lovely texture to stay light and fluffy!
Baking the Cake
Now comes the fun part! Grab a greased baking sheet and spread your batter evenly across it. You want a nice, thin layer covering the whole sheet. Pop it into a preheated oven at 375°F (190°C) and set a timer for 15 minutes. Keep an eye on it—your cake is done when it springs back slightly when touched. You can also check with a toothpick; it should come out clean!
Rolling and Cooling
Once the cake is out of the oven, act quickly! You need to invert it onto a clean kitchen towel that’s been dusted with powdered sugar. This prevents sticking—trust me, you don’t want your beautiful cake falling apart! Carefully peel off the parchment paper (if you used any), then roll the cake up in the towel starting from one of the shorter ends. Let it cool like this for about 30 minutes. This step helps it hold that lovely rolled shape when we fill it later.
Preparing the Cream Cheese Filling
While your cake cools, let’s work on that dreamy cream cheese filling! In a mixing bowl, beat the softened cream cheese, powdered sugar, and butter until everything is smooth and creamy. You want it to be spreadable but not runny—this is where the magic happens! Just a little tip: make sure your cream cheese is really softened; it makes the mixing so much easier and results in the best filling.
Assembling the Pumpkin Rolls
Once your cake is cool, gently unroll it from the towel. Spread that luscious cream cheese filling evenly over the surface, leaving a little space at the edges. Now, roll the cake back up (without the towel this time!), starting from the opposite end. Wrap it in plastic wrap and chill it in the refrigerator for at least an hour before slicing. This helps the filling set and makes for cleaner cuts!
And there you have it! Your pumpkin rolls are ready to be enjoyed. Just slice them up and watch how everyone will be reaching for seconds!
Why You’ll Love This Recipe
Honestly, there’s so much to adore about these pumpkin rolls! They’re not just a treat; they’re an experience. Here’s why you absolutely need to make them:
- Easy Preparation: With simple steps and straightforward ingredients, you’ll find that making pumpkin rolls is a breeze, even for beginner bakers!
- Delicious Flavor: The combination of pumpkin and warm spices creates a cozy flavor that’s perfect for fall. Each bite is like a little piece of autumn!
- Perfect for Gatherings: Whether it’s a Thanksgiving feast or a cozy get-together, these rolls are a showstopper. They look impressive but are surprisingly easy to make!
- Great for Sharing: Cut them into slices and watch how they disappear! Everyone will want a piece of this delightful dessert, making it perfect for sharing with friends and family.
- Versatile Treat: You can easily customize the filling or add different spices to suit your taste. The possibilities are endless!
Trust me, once you whip up a batch of these pumpkin rolls, you’ll be the star of your next gathering!
Tips for Success
Ready to make your pumpkin rolls the absolute best they can be? I’ve got you covered with some handy tips that’ll help ensure your rolls turn out perfectly every time!
- Use Room Temperature Ingredients: Make sure your eggs, cream cheese, and butter are at room temperature before you start mixing. This helps everything blend smoothly and creates that dreamy filling!
- Don’t Overmix: When combining your wet and dry ingredients, be gentle! Overmixing can lead to a denser cake, so just fold until everything is combined. Remember, we want that light and fluffy texture!
- Check Your Oven Temperature: Ovens can vary, so it’s a good idea to use an oven thermometer to ensure yours is at the right temperature. If your rolls bake too hot, they might dry out or crack!
- Be Quick When Rolling: As soon as the cake comes out of the oven, roll it up with the towel quickly. This helps it retain that shape. If it cools too much, it can become brittle and crack when you try to roll it!
- Chill Before Slicing: I know it’s tempting to dig in right away, but chilling your pumpkin rolls for at least an hour helps the filling set and makes slicing much easier. Plus, the flavors meld beautifully!
- Dust with Powdered Sugar: For that extra touch, dust the finished rolls with powdered sugar right before serving. It adds a lovely sweetness and makes them look extra special!
Just follow these tips, and you’ll be well on your way to making the most delicious pumpkin rolls that everyone will rave about! Happy baking!
Storage & Reheating Instructions
Once you’ve made your delicious pumpkin rolls, you might be wondering about storing any leftovers (if there are any!). The good news is that these rolls keep really well, so you can enjoy them for days to come!
To store your pumpkin rolls, wrap them tightly in plastic wrap or aluminum foil. This helps to keep them fresh and prevents them from drying out. Place the wrapped rolls in an airtight container and pop them in the refrigerator. They’ll stay fresh for up to 5 days, so you can easily enjoy them throughout the week.
If you want to keep them for a longer time, you can freeze the pumpkin rolls! Just wrap each roll tightly in plastic wrap and then in foil to prevent freezer burn. They can be frozen for up to 3 months. When you’re ready to enjoy them, simply transfer the rolls to the fridge and let them thaw overnight. This way, they’ll be ready to slice and serve the next day!
If you prefer your pumpkin rolls warm, you can reheat them in the microwave. Just slice a piece and pop it in for about 10-15 seconds. You want it warm, not hot, so it stays soft and delicious. You can also reheat them in a preheated oven at 350°F (175°C) for about 5-10 minutes. Just cover them with foil to keep them from getting too crusty while warming up.
And there you have it! With these simple storage and reheating instructions, your pumpkin rolls will be ready for you whenever you crave a taste of that fall magic!
Nutritional Information
As with all delicious treats, the nutritional values can vary based on the specific ingredients and brands you use. While I can’t provide exact figures, here’s a general idea of what to expect per serving of these delightful pumpkin rolls:
- Calories: 150
- Fat: 7g
- Saturated Fat: 4g
- Trans Fat: 0g
- Cholesterol: 30mg
- Sodium: 150mg
- Carbohydrates: 20g
- Fiber: 1g
- Sugar: 10g
- Protein: 2g
Keep in mind that these values are just estimates and can change based on how you prepare your rolls. But don’t worry too much about the numbers—just enjoy every delicious bite of your pumpkin rolls!
FAQ Section
Can I use fresh pumpkin instead of canned?
Absolutely! You can use fresh pumpkin if you prefer. Just make sure to cook and puree it first. A great way to do this is to roast your pumpkin in the oven until it’s tender, then scoop out the flesh and blend it until smooth. Aim for about 1 cup of fresh puree to match the amount in the recipe. Just remember, fresh pumpkin can have a bit more moisture than canned, so you might need to adjust the flour slightly to get the right consistency!
How do I prevent the cake from cracking?
Cracking can happen, but there are a few tricks to help avoid it! First, make sure to roll the cake while it’s still warm—this helps it maintain its shape. Also, be gentle when rolling; too much pressure can lead to cracks. If you find the cake is slightly too cool, you can warm it up for a few seconds in the microwave to make it more pliable. Lastly, if you see small cracks forming, don’t stress too much; a little frosting will cover them up beautifully!
Can I make these pumpkin rolls ahead of time?
Yes, you can! Pumpkin rolls are fantastic for making ahead of time. You can prepare the rolls and store them wrapped tightly in plastic wrap in the refrigerator for up to 2 days before serving. If you want to go further ahead, you can freeze them! Just wrap the rolls securely in plastic wrap and then in foil. They’ll keep well in the freezer for up to 3 months. When you’re ready to enjoy them, let them thaw in the fridge overnight, and then slice and serve!
What can I substitute for cream cheese in the filling?
If you’re looking for alternatives to cream cheese, there are some great options! You can use mascarpone cheese for a rich, creamy texture, or even Greek yogurt for a lighter option. If you want a vegan substitute, try using a dairy-free cream cheese or a blended cashew cream (soak cashews and blend them with a bit of lemon juice and maple syrup). Just keep in mind that the flavor and texture might vary a bit, but they’ll still be delicious!
How long do pumpkin rolls last?
Your delicious pumpkin rolls will last about 5 days in the refrigerator when stored properly. Just make sure to keep them wrapped to maintain their moisture. If you freeze them, they’ll hold up for about 3 months. When you’re ready to enjoy, let them thaw overnight in the fridge, and they’ll taste just as good as the day you made them!
Serving Suggestions
Now that you’ve created these delicious pumpkin rolls, you might be wondering how to serve them up for maximum enjoyment. Trust me, they shine even brighter when paired with the right drinks or other tasty treats! Here are some delightful suggestions:
- Coffee: A warm cup of coffee is the perfect match for pumpkin rolls. The robust flavors complement the sweet, spiced cake beautifully.
- Tea: If you prefer something lighter, a cup of chai or spiced tea enhances the autumn vibes and pairs wonderfully with the cream cheese filling.
- Whipped Cream: A dollop of freshly whipped cream on top of each slice adds an extra layer of indulgence. It’s like a little cloud of happiness!
- Ice Cream: For a fun twist, serve your pumpkin rolls with a scoop of vanilla or cinnamon ice cream. The cold creaminess is a delightful contrast to the soft roll.
- Other Desserts: Consider serving them alongside some pecan pie or apple crisp for a sweet dessert platter that will have everyone swooning!
Feel free to get creative with your pairings! No matter how you choose to serve them, these pumpkin rolls are sure to be a hit!
Print
Pumpkin Rolls: 5 Cozy Reasons to Love This Fall Delight
- Total Time: 1 hour 35 minutes
- Yield: 10 servings 1x
- Diet: Vegetarian
Description
Delicious pumpkin rolls filled with cream cheese frosting.
Ingredients
- 2 cups all-purpose flour
- 1 teaspoon baking powder
- 1 teaspoon baking soda
- 1/2 teaspoon salt
- 1 teaspoon ground cinnamon
- 1/2 teaspoon ground ginger
- 1 cup granulated sugar
- 1 cup canned pumpkin puree
- 3 large eggs
- 1 teaspoon vanilla extract
- 8 oz cream cheese, softened
- 1/2 cup powdered sugar
- 1/4 cup unsalted butter, softened
Instructions
- Preheat the oven to 375°F (190°C).
- In a bowl, mix flour, baking powder, baking soda, salt, cinnamon, and ginger.
- In another bowl, whisk together sugar, pumpkin, eggs, and vanilla.
- Combine the dry ingredients with the wet ingredients.
- Spread the batter onto a greased baking sheet.
- Bake for 15 minutes.
- While baking, prepare a clean kitchen towel dusted with powdered sugar.
- Remove the cake from the oven and immediately invert it onto the towel.
- Roll the cake with the towel and let it cool.
- Beat cream cheese, powdered sugar, and butter until smooth.
- Unroll the cake and spread the cream cheese mixture over it.
- Roll the cake back up without the towel.
- Chill for at least 1 hour before slicing.
Notes
- Store in the refrigerator for up to 5 days.
- Can be frozen for up to 3 months.
- Dust with additional powdered sugar before serving.
- Prep Time: 20 minutes
- Cook Time: 15 minutes
- Category: Dessert
- Method: Baking
- Cuisine: American
Nutrition
- Serving Size: 1 roll
- Calories: 150
- Sugar: 10g
- Sodium: 150mg
- Fat: 7g
- Saturated Fat: 4g
- Unsaturated Fat: 2g
- Trans Fat: 0g
- Carbohydrates: 20g
- Fiber: 1g
- Protein: 2g
- Cholesterol: 30mg
Keywords: Pumpkin Rolls, Pumpkin Dessert, Fall Treats