

Decadent Chocolate Mousse Brownies: A Dreamy Layered Dessert
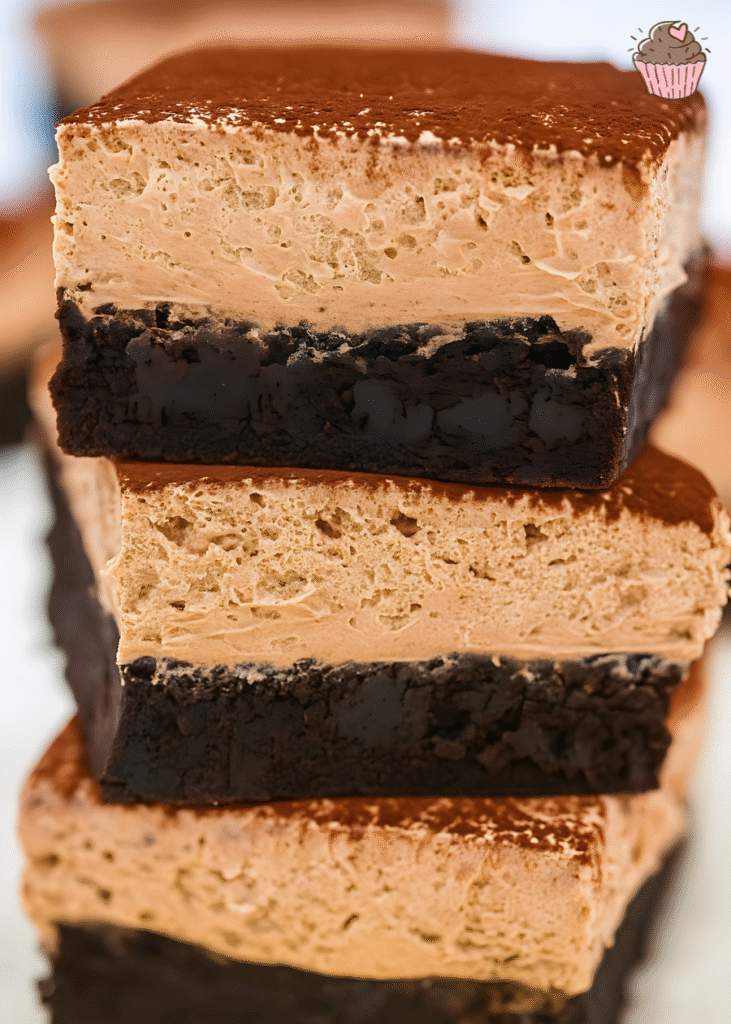
Oh, my sweet friends, get ready to fall head over heels for a dessert that’s truly out of this world! These Chocolate Mousse Brownies are the epitome of indulgence, combining a rich, fudgy brownie base with a light-as-air chocolate mousse, all crowned with a glossy chocolate ganache. It’s a symphony of textures and flavors that will make any chocolate lover swoon.
Why You Will Absolutely Adore These Chocolate Mousse Brownies
- Layers of Perfection: You get three distinct, harmonious layers – a chewy brownie, a fluffy mousse, and a silky ganache – each contributing to an unforgettable experience.
- Intense Chocolate Flavor: From the deep cocoa of the brownie to the delicate richness of the mousse and the bittersweet kick of the ganache, it’s a chocolate lover’s paradise.
- Crowd-Pleasing Elegance: This dessert looks incredibly impressive, making it perfect for special occasions, holidays, or simply when you want to treat yourself and your loved ones to something extraordinary.
- Surprisingly Approachable: While it looks fancy, I promise you, the steps are straightforward and totally manageable for any home baker. We’ll break it down together!
- Make-Ahead Friendly: You can prepare these beauties in stages, or even entirely ahead of time, which is a lifesaver for entertaining.
Table of Contents
What You’ll Need: The Essential Ingredients
For the Fudgy Brownie Layer
- 1 cup (2 sticks / 226g) unsalted butter
- 1 ¾ cups (350g) granulated sugar
- 4 large eggs, at room temperature
- 1 teaspoon pure vanilla extract
- 1 cup (125g) all-purpose flour
- ¾ cup (75g) unsweetened cocoa powder, Dutch-processed preferred
- ½ teaspoon salt
- 1 cup (170g) semi-sweet chocolate chips or chopped chocolate
For the Light-as-Air Chocolate Mousse
- 1 ½ cups (360ml) heavy cream, chilled
- ½ cup (60g) powdered sugar
- 1 teaspoon pure vanilla extract
- ¼ cup (25g) unsweetened cocoa powder
- 4 ounces (113g) semi-sweet chocolate, melted and slightly cooled
- 1 teaspoon unflavored gelatin powder
- 2 tablespoons cold water
For the Silky Chocolate Ganache Topping
- ½ cup (120ml) heavy cream
- 4 ounces (113g) semi-sweet chocolate, finely chopped
Let’s Get Baking: Step-by-Step Guide
Part 1: The Fudgy Brownie Base
- Prepare Your Pan: Preheat your oven to 350°F (175°C). Line a 9×13 inch baking pan with parchment paper, leaving an overhang on the sides to easily lift the brownies out later. Lightly grease the parchment.
- Melt Butter & Sugar: In a large, microwave-safe bowl or a saucepan over low heat, melt the butter. Once melted, stir in the granulated sugar until well combined. Allow this mixture to cool slightly for about 5 minutes.
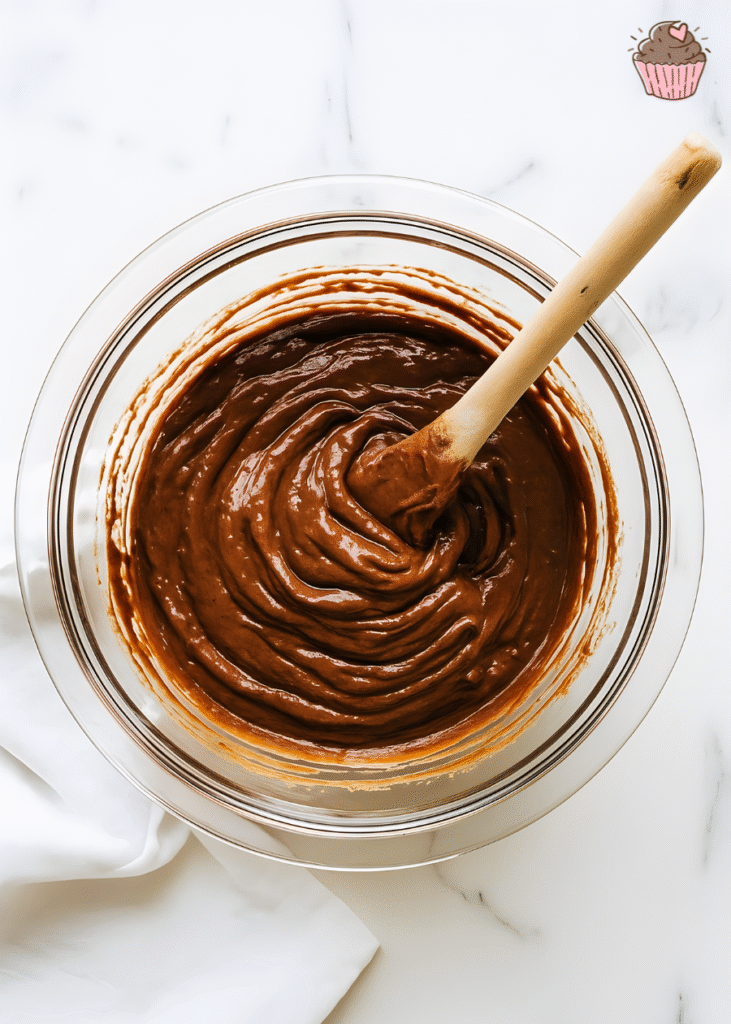
- Add Wet Ingredients: Whisk in the eggs one at a time, ensuring each is fully incorporated before adding the next. Stir in the vanilla extract. The mixture should be glossy and smooth.
- Combine Dry Ingredients: In a separate medium bowl, whisk together the all-purpose flour, cocoa powder, and salt. Gradually add the dry ingredients to the wet ingredients, mixing until just combined. Be careful not to overmix; a few streaks of flour are fine.
- Fold in Chocolate Chips: Gently fold in the semi-sweet chocolate chips or chopped chocolate.
- Bake the Brownies: Pour the batter into your prepared pan and spread evenly. Bake for 25-30 minutes, or until a toothpick inserted into the center comes out with moist crumbs, but not wet batter. Don’t overbake! Let the brownies cool completely in the pan on a wire rack.
Part 2: The Dreamy Chocolate Mousse
- Bloom Gelatin: In a small, microwave-safe bowl, sprinkle the gelatin powder over 2 tablespoons of cold water. Let it sit for 5 minutes to bloom (it will thicken).
- Melt Gelatin: Microwave the bloomed gelatin for 10-15 seconds, or until it’s fully dissolved and clear. Set aside to cool slightly.
- Whip Cream: In a large mixing bowl, using an electric mixer, whip the chilled heavy cream, powdered sugar, and vanilla extract on medium-high speed until medium-stiff peaks form. Be careful not to over-whip, or it will become grainy.
- Melt Chocolate: Melt the 4 ounces of semi-sweet chocolate in a microwave-safe bowl in 30-second intervals, stirring between each, until smooth. Let it cool slightly.
- Combine Mousse Ingredients: Gently fold the cooled melted chocolate into the whipped cream mixture. Then, slowly drizzle in the cooled, dissolved gelatin while continuously folding until thoroughly combined. Make sure there are no streaks of gelatin.
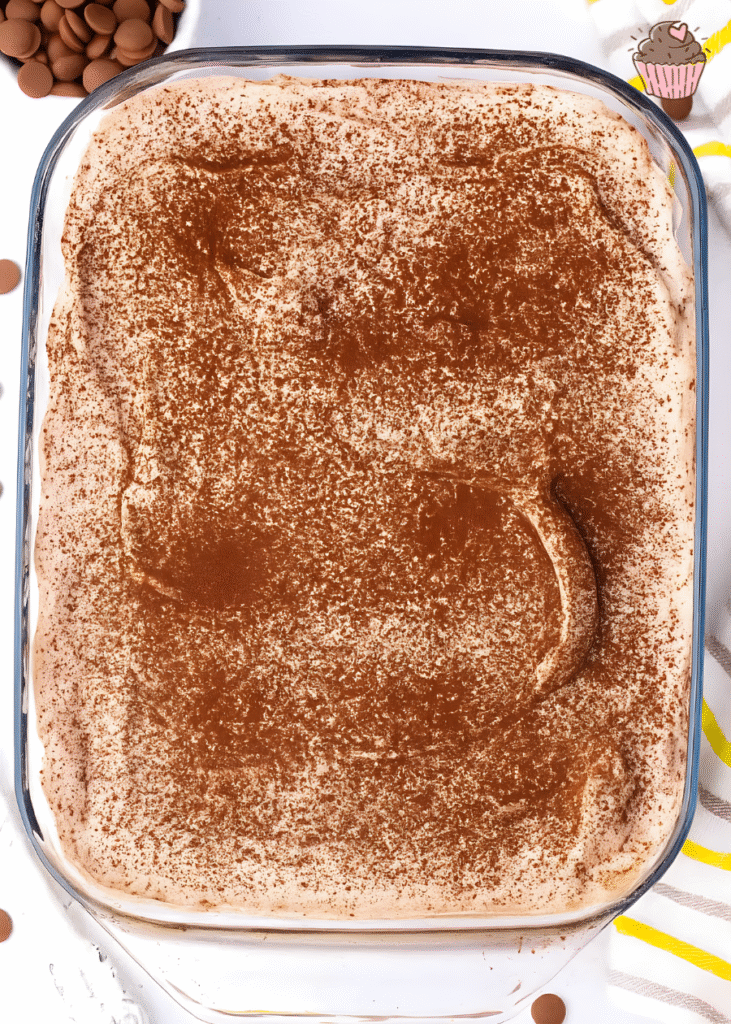
- Chill Mousse: Spread the chocolate mousse evenly over the cooled brownie layer. Cover the pan loosely with plastic wrap and refrigerate for at least 2-4 hours, or until the mousse is set.
Part 3: The Silky Ganache Topping
- Heat Cream: In a small saucepan, heat the heavy cream over medium-low heat until it just begins to simmer around the edges. Do not boil.
- Melt Chocolate: Remove the cream from the heat and immediately pour it over the finely chopped semi-sweet chocolate in a heatproof bowl. Let it sit for 5 minutes without stirring.
- Whisk Ganache: After 5 minutes, gently whisk the mixture from the center outwards until it’s completely smooth and glossy. If it’s not fully melted, you can return it to the saucepan for a few seconds over very low heat, stirring constantly.
- Pour & Chill: Allow the ganache to cool for about 10-15 minutes at room temperature, stirring occasionally, until it’s slightly thickened but still pourable. Carefully pour the ganache over the chilled mousse layer, spreading it evenly with an offset spatula.
- Final Chill: Refrigerate the Chocolate Mousse Brownies for at least 30 minutes to an hour, or until the ganache is set. For the cleanest slices, chill for at least an hour before cutting.
Part 4: Serving Your Masterpiece
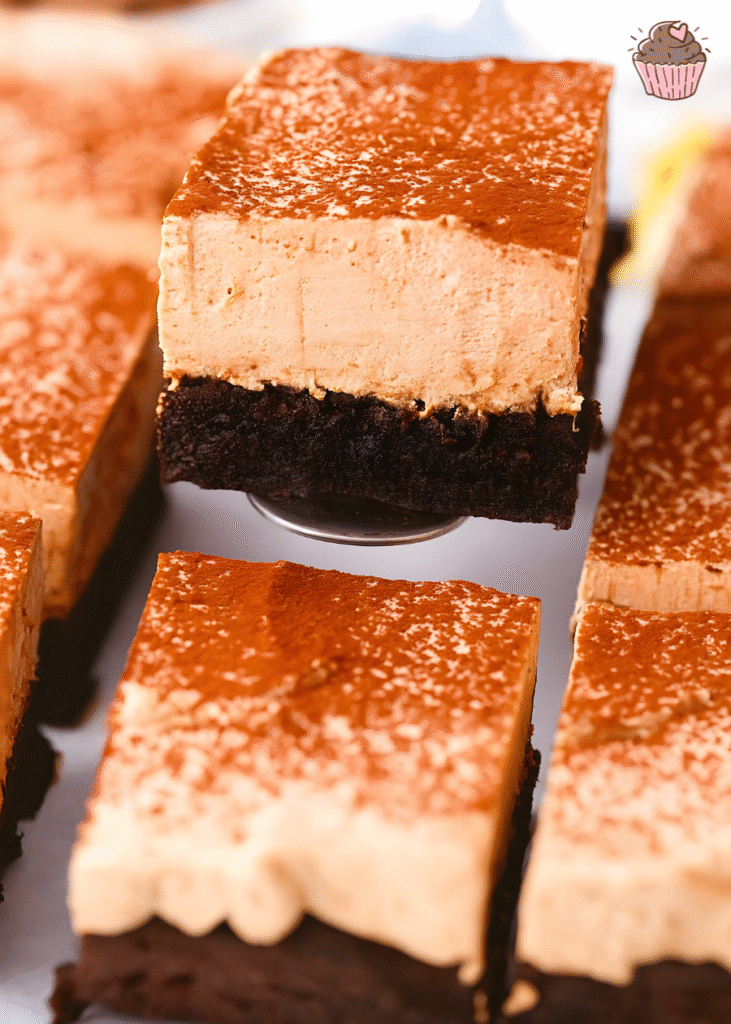
- Warm Knife: To get clean slices, run a sharp knife under hot water, wipe it dry, and then make each cut. Repeat for every slice.
- Serve & Enjoy: Lift the brownies out of the pan using the parchment paper overhang. Cut into squares and serve! These are best served slightly chilled.
Substitutions and Creative Variations
Brownie Layer Swaps
- Gluten-Free Brownies: You can easily make the brownie base gluten-free by using a 1:1 gluten-free all-purpose flour blend. Ensure it contains xanthan gum, or add ¼ teaspoon if it doesn’t.
- Nutty Addition: Fold in ½ cup of chopped walnuts or pecans with the chocolate chips for a delightful crunch in your brownie layer.
Mousse Magic
- Dark Chocolate Mousse: For a more intense chocolate experience, use dark chocolate (70% cacao) instead of semi-sweet for the mousse layer. You might want to slightly increase the powdered sugar to balance the bitterness.
- Coffee Mousse: Infuse the mousse with a coffee flavor! Dissolve 1-2 teaspoons of instant espresso powder in the melted chocolate before folding it into the whipped cream.
- Mint Mousse: Add ½ teaspoon of peppermint extract to the mousse mixture for a refreshing mint-chocolate twist.
Ganache Creativity
- Salted Caramel Ganache: Instead of plain chocolate ganache, top your brownies with a luscious salted caramel ganache for a sweet and salty finish.
- White Chocolate Drizzle: After the dark chocolate ganache has set, drizzle some melted white chocolate over the top for a beautiful marbled effect.
- Espresso Ganache: Add 1 teaspoon of instant espresso powder to the hot cream before pouring it over the chopped chocolate for a subtle coffee kick.
Maria‘s Serving Suggestions
- Simple & Elegant: Serve slices as they are, letting the layers speak for themselves. A dusting of cocoa powder or a few chocolate shavings on top adds a touch of sophistication.
- Berry Bliss: A side of fresh raspberries or sliced strawberries provides a lovely tart contrast to the rich chocolate.
- Coffee Companion: These brownies are absolutely divine with a hot cup of coffee, espresso, or a glass of cold milk.
- A La Mode: For an extra special treat, serve a slightly warmed slice with a scoop of vanilla bean ice cream or a dollop of fresh whipped cream.
Storage Tips for Your Chocolate Mousse Brownies
- Refrigeration: Because of the mousse layer, these brownies must be stored in the refrigerator. Keep them in an airtight container for up to 4-5 days.
- Freezing: You can freeze individual slices! Wrap each tightly in plastic wrap, then place them in a freezer-safe bag or container for up to 1-2 months. Thaw in the refrigerator overnight before serving.
Maria‘s Golden Tip for Perfect Mousse Brownies
The secret to perfectly set mousse and ganache, and incredibly clean slices, is patience with chilling! Don’t rush the refrigeration steps. A fully chilled dessert is not only easier to cut but also allows the flavors to meld beautifully, giving you that truly decadent experience.
Time to Indulge!
There you have it, my friends! A recipe for Chocolate Mousse Brownies that’s bound to become a new favorite in your baking repertoire. This isn’t just a dessert; it’s an experience, a moment of pure chocolate bliss. The fudgy brownie, the ethereal mousse, the smooth ganache – each layer plays its part in creating a symphony of textures and tastes. Don’t be intimidated by the layers; I promise you, the joy of seeing your family and friends’ faces light up when they take that first bite is absolutely priceless. So, tie on your apron, gather your ingredients, and let’s make some magic happen in your kitchen. Happy baking, and happy indulging!

Decadent Chocolate Mousse Brownies: A Dreamy Layered Dessert
- Total Time: 5 hours 20 minutes (includes chilling)
- Yield: 16 servings 1x
- Diet: Vegetarian
Description
Indulge in these decadent Chocolate Mousse Brownies, featuring a rich, fudgy brownie base, a light and airy chocolate mousse layer, and a glossy chocolate ganache topping. Perfect for any special occasion!
Ingredients
- 1 cup (2 sticks / 226g) unsalted butter
- 1 ¾ cups (350g) granulated sugar
- 4 large eggs, at room temperature
- 1 teaspoon pure vanilla extract
- 1 cup (125g) all-purpose flour
- ¾ cup (75g) unsweetened cocoa powder, Dutch-processed preferred
- ½ teaspoon salt
- 1 cup (170g) semi-sweet chocolate chips or chopped chocolate
- 1 ½ cups (360ml) heavy cream, chilled
- ½ cup (60g) powdered sugar
- 1 teaspoon pure vanilla extract (for mousse)
- ¼ cup (25g) unsweetened cocoa powder (for mousse)
- 4 ounces (113g) semi-sweet chocolate, melted and slightly cooled (for mousse)
- 1 teaspoon unflavored gelatin powder
- 2 tablespoons cold water
- ½ cup (120ml) heavy cream (for ganache)
- 4 ounces (113g) semi-sweet chocolate, finely chopped (for ganache)
Instructions
- Prepare Your Pan: Preheat oven to 350°F (175°C). Line a 9×13 inch baking pan with parchment paper, leaving an overhang. Lightly grease.
- Melt Butter & Sugar: Melt butter. Stir in granulated sugar. Cool slightly.
- Add Wet Ingredients: Whisk in eggs one at a time, then vanilla extract.
- Combine Dry Ingredients: Whisk flour, cocoa powder, and salt. Gradually add to wet ingredients, mixing until just combined.
- Fold in Chocolate Chips: Gently fold in semi-sweet chocolate chips.
- Bake Brownies: Pour batter into pan, spread evenly. Bake 25-30 minutes. Cool completely.
- Bloom Gelatin: Sprinkle gelatin powder over cold water. Let sit 5 minutes.
- Melt Gelatin: Microwave bloomed gelatin 10-15 seconds until clear. Cool slightly.
- Whip Cream: In a large bowl, whip chilled heavy cream, powdered sugar, and vanilla extract until medium-stiff peaks form.
- Melt Chocolate: Melt 4 ounces semi-sweet chocolate. Cool slightly.
- Combine Mousse Ingredients: Gently fold cooled melted chocolate into whipped cream. Slowly drizzle in cooled dissolved gelatin, folding until combined.
- Chill Mousse: Spread mousse over cooled brownie. Cover and refrigerate 2-4 hours until set.
- Heat Cream (Ganache): Heat ½ cup heavy cream until simmering.
- Melt Chocolate (Ganache): Pour hot cream over finely chopped semi-sweet chocolate. Let sit 5 minutes.
- Whisk Ganache: Whisk from center outwards until smooth and glossy. Cool 10-15 minutes, stirring occasionally.
- Pour & Chill: Pour ganache over chilled mousse. Spread evenly. Refrigerate 30 minutes to 1 hour, or until set.
- Serve: For clean slices, run a sharp knife under hot water, wipe dry, and cut. Serve chilled.
Notes
- Use Dutch-processed cocoa powder for a darker, less bitter brownie.
- Ensure all components (brownie, mousse, ganache) are adequately chilled before adding the next layer for best results.
- Do not overmix the brownie batter or over-whip the heavy cream for the mousse.
- For extra elegance, garnish with chocolate shavings or a dusting of cocoa powder before serving.
- Prep Time: 50 minutes
- Cook Time: 30 minutes
- Category: Dessert
- Method: Baking, Chilling
- Cuisine: American
Nutrition
- Serving Size: 1 square
- Calories: 450 kcal
- Sugar: 45g
- Sodium: 120mg
- Fat: 30g
- Saturated Fat: 18g
- Unsaturated Fat: 12g
- Trans Fat: 0g
- Carbohydrates: 55g
- Fiber: 4g
- Protein: 6g
- Cholesterol: 85mg
Keywords: Chocolate Mousse Brownies, fudgy brownies, chocolate ganache, layered dessert, decadent dessert, homemade brownies, chocolate recipe, special occasion dessert
Frequently Asked Questions About Chocolate Mousse Brownies
Can I make these Chocolate Mousse Brownies ahead of time?
Absolutely! These brownies are actually fantastic when made a day in advance. The chilling time allows all the layers to firm up beautifully and the flavors to meld, making for an even more delicious and easy-to-slice dessert. Just keep them covered in the refrigerator until you’re ready to serve.
What kind of chocolate should I use for the best flavor?
For the best results, I recommend using a good quality semi-sweet chocolate for all layers. Belgian or gourmet baking chocolate will give you a richer, more complex flavor profile. You can use chocolate chips, but finely chopped baking bars often melt more smoothly and provide a superior texture in the mousse and ganache.
My mousse isn’t setting. What went wrong?
There are a few reasons this might happen. The most common culprits are not whipping the cream enough, or the gelatin not being fully dissolved or properly incorporated. Make sure your heavy cream is very cold when you start whipping it, and ensure the gelatin is completely melted and cooled slightly before adding it to the mousse mixture to avoid lumps or a runny texture. Also, make sure to give it ample chilling time!
Can I use unsweetened chocolate for the ganache?
You can, but it will result in a much more intense, bittersweet ganache. If you prefer a less sweet dessert, go for it! However, you might want to add a tablespoon or two of powdered sugar to the ganache mixture to balance the bitterness, or stick with semi-sweet for a universally loved flavor.
How do I get really clean slices?
This is a common question! The key is to ensure your brownies are very well chilled – ideally for several hours or even overnight. Before each cut, dip a sharp, thin knife into hot water, wipe it clean and dry, then slice. Repeat this process for every cut. This warms the blade just enough to glide through the layers without sticking or dragging.